


OS X Daily: “Uninstall Diablo 3 Open Beta and Reclaim 5GB+ Disk Space” plus 5 more |  |

- Uninstall Diablo 3 Open Beta and Reclaim 5GB+ Disk Space
- Redsn0w 0.9.10b8 Includes iPhone SAM Unlock Preservation
- Unlock Any iPhone 4S, iPhone 4, or iPhone 3GS Right Now with SAM
- Replace a Frayed iPhone USB Cable for $1 (Maybe)
- How to Format a Drive for Mac & PC Compatibility
- Disable Pinch to Zoom Gesture in Safari & Mac OS X
| Uninstall Diablo 3 Open Beta and Reclaim 5GB+ Disk Space Posted: 23 Apr 2012 11:45 AM PDT
The Diablo 3 Open Beta was a lot of fun and certainly got everyone excited for the May 15 public release, but now that the Diablo III Beta client can’t be used any more it’s time to uninstall the app from your Mac. This will free up at least 5GB of disk space. Follow the manual uninstall instructions below, or use something like AppCleaner to automate the deletion process:
Now empty the Trash to remove Diablo 3 Beta from your Mac completely, freeing up quite a bit of disk space. If you want to find more wasted space on a Mac, check out our guide to using OmniDiskSweeper. These instructions are the same for the original Diablo 3 Beta client as well if you were lucky enough to be a part of that.
|
| Redsn0w 0.9.10b8 Includes iPhone SAM Unlock Preservation Posted: 23 Apr 2012 11:01 AM PDT
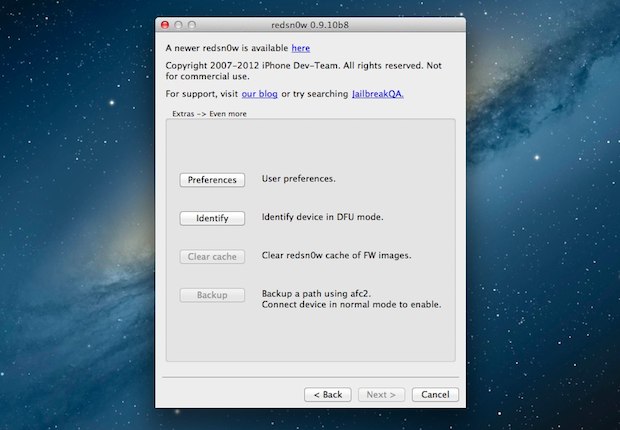
Right alongside the new SAM iPhone unlock method is an updated version of Redsn0w which helps users preserve their unlock. Dubbed Redsn0w 0.9.10b8, the updated release does not include any new jailbreaks and is only useful for individuals looking to save an iPhone unlock achieved through the Subscriber Artificial Module spoof method. Download Redsn0w 0.9.10b8
Saving the SAM UnlockUsing the new version of redsn0w to save an unlock for the future is done in a few simple steps:
Don’t lose the zip file if you want to keep the unlock, future versions of Redsn0w will likely use it to preserve unlocks.
|
| Unlock Any iPhone 4S, iPhone 4, or iPhone 3GS Right Now with SAM Posted: 23 Apr 2012 10:40 AM PDT
A new unlock method has been discovered that works on every iPhone 4, iPhone 4S, and iPhone 3GS running iOS 5, iOS 5.0.1, and even iOS 5.1, the only requirement is the iPhone must be jailbroken already. If you’re already jailbroke go ahead, otherwise here are guides to jailbreak iOS 5.1 and another guide for the iPhone 4S with iOS 5.0.1.
The downside to the SAM unlock method is that it requires a jailbreak, that means if you lose your the jailbreak you lose the unlock. If you don’t want to jailbreak or you can’t for some reason, you can officially unlock an iPhone from AT&T by phone or through AT&T via web chat instead. It can take several weeks for the unlock request to process with AT&T and the iPhone must be out of contract, but it doesn’t require any funky software mods and is much easier than the aforementioned SAM method. Great find by Singularity and @musclenerd.
|
| Replace a Frayed iPhone USB Cable for $1 (Maybe) Posted: 23 Apr 2012 09:44 AM PDT
Have a fraying iPhone or iPod USB sync cable? Welcome to the frayed cable club. Now, you have a few choices if you’re floating the boat of cable frays: try to get Apple to replace it for free at about a 40% success rate, shell out $29.99 for an official cable, jury rig a hideous repair by slapping on some electrical or duct tape, or roll the dice with $1 and get a brand new knock-off replacement. Obviously the best approach is to get a replacement from Apple, but they typically only replace these cables if they fray within the first year of a devices ownership. You may have better success at the Genius Bar, but for me going to the Apple Store isn’t convenient anyway, and something about paying $29.99 for a couple wires wrapped in rubber rubs me the wrong way. Initially I just globbed some electrical tape on the portion of the fraying cable, but within a few days it attracted more cat hair than a velvet suit at a vet clinic and about a week later I think it developed a pulse and started trying to communicate with me, plus lets face it, it looks like crap. Enter the great $1 Amazon cable gamble We’re throwing this out there because these cheap replacement cords have worked for ourselves and friends on multiple occasions, but we’ve also got a dud before. Accept that little caveat beforehand, because your $1 may or may not be well spent, it ultimately depends on where the cable ships from. Buying from iKingshop, VVT, or Importer520 all have very favorable ratings, but as you can see from some of the other Amazon ratings there are a few sellers that ship you rubbish for a dollar. Good luck!
|
| How to Format a Drive for Mac & PC Compatibility Posted: 22 Apr 2012 04:39 PM PDT
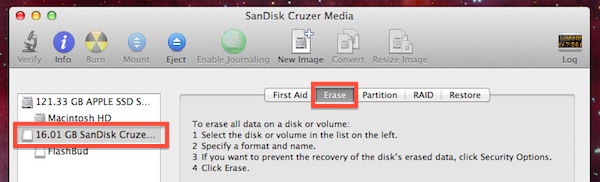
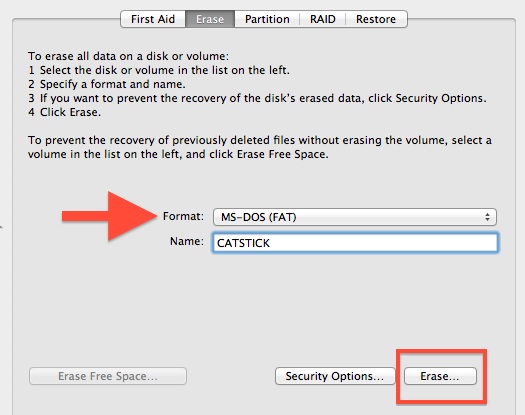
Formatting a hard drive or USB flash disk to be compatible with both a Mac and Windows PC is extremely easy, we’ll walk you through the process in a few simple steps. Remember, formatting a drive erases all data contained on it so back up important files before proceeding.
If you wish to boot the drive on a PC or use it with older versions of Windows, you may also need to set the partition scheme to Master Boot Record (MBR) for full Windows compatibility:
Drives format very quickly, though the total time taken will depend on the size of the drive. The resulting file system is compatible with all versions of Mac OS X, Windows 95, 98, Windows XP, Vista, 7, even Windows 8, it’s one of the most widely recognized and usable file system formats. This makes FAT an ideal file system to use for USB flash drives or external hard drives that are intended for use in environments with multiple operating systems. The primary downside to using FAT32 is the file size limit, which limits files on the drive to being 4GB in size or less. If you require single files to be larger than 4GB, use exFAT instead, though you will lose some compatibility with older versions of OS X and Windows. If you only intend on using the drive on a Mac it’s recommended to format for Mac OS X use only using the journaled file system. Just be aware that the Mac-only formats are typically not readable by Windows machines.
|
| Disable Pinch to Zoom Gesture in Safari & Mac OS X Posted: 22 Apr 2012 04:12 PM PDT
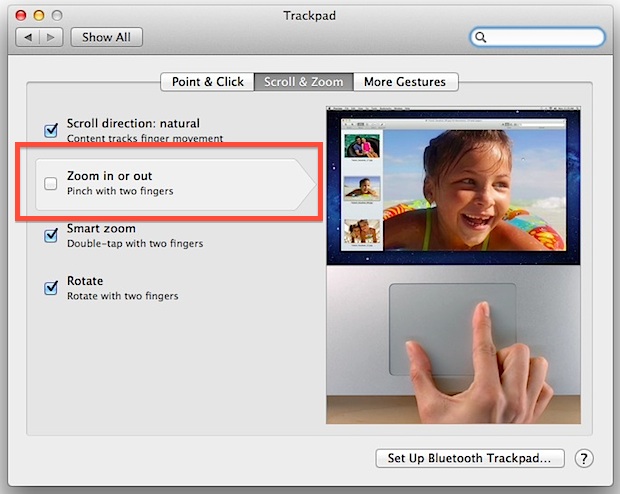
The pinch to zoom gesture is one of those features borrowed from iOS that has since come to the Mac OS X platform. It’s a natural fit for iOS and even in some places within OS X, but it’s also much easier to accidentally activate on the Mac when doing something simple like browsing the web. All it takes is an extra finger or thumb on the trackpad and the zoom is accidentally enabled, which can have a strange effect of causing a Safari window to lock up with all text and images in a frozen blurred state. Several people I know have interpreted this inadvertent zoom activation as the Safari browser freezing, and it can be frustrating enough that some will want to disable it:
Unfortunately when you turn off pinch to zoom it is system wide, meaning you will lose the gesture elsewhere in OS X in addition to Safari. You can still use the two-finger screen zoom though, which is activated with a scrolling motion and hot key.
|


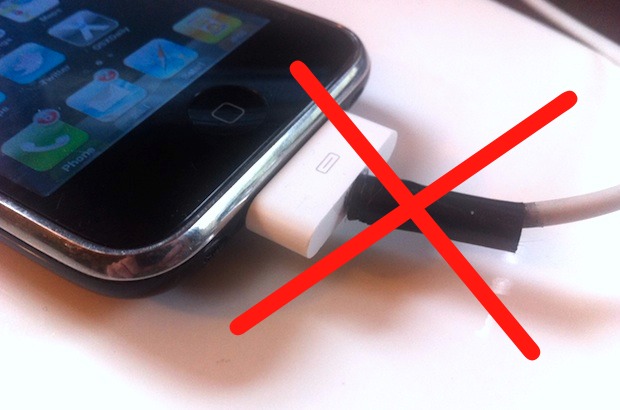
 ! For the whopping price of a buck with free shipping included, you can order a cheapo knock-off cable from Amazon, and about 85% of the time the cable is great and works perfectly. The other 15% of the time the cable may not work that well or it looks so janky you’ll be embarrassed to be seen with it in public. Nonetheless, those odds are better than Vegas, so if you’re up for some adventure, shell out a dollar and cross your fingers to get a knock-off cord replacement at a fraction of the price of the official iOS device syncing cable.
| You are subscribed to email updates from OS X Daily To stop receiving these emails, you may unsubscribe now. | Email delivery powered by Google |
| Google Inc., 20 West Kinzie, Chicago IL USA 60610 | |
0 comments:
Post a Comment