| Secure an iPad or iPhone with a Stronger Passcode Posted: 19 Mar 2012 10:30 AM PDT 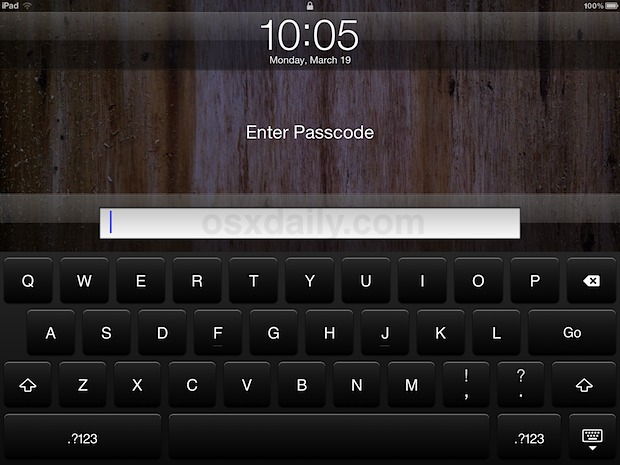
The default passcode for iPad and iPhone uses a fairly simple four digit numerical password, these are fairly easy to guess because statistically many people use common passwords or some variation of a simple theme, like a repetition, countdown, or birth year. An easy way to add more security to an iOS device is to disable simple passcodes and utilize the full keyboard, here’s how to enable this setting. - Tap on “Settings” and tap “General”
- Tap on “Passcode Lock” and enter the current passcode
- Next to “Simple Passcode” slide the ON button so that it’s off
- Enter the old simple 4 digit passcode, and then enter the new password based on the full keyboard and special characters
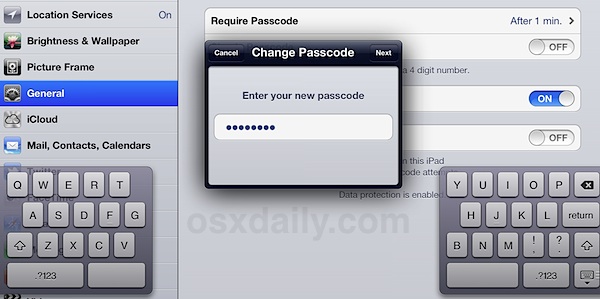
You can now use a combination of letters, numbers, and special characters, though using the latter can be difficult to remember since their placement is different on the iOS keyboard than a standard QWERTY layout. Don’t set something so complicated that you can’t remember it yourself, though it isn’t too difficult to reset if you need to, assuming you have access to a computer. For those especially concerned with security, you can also set the iPhone or iPad to “self destruct” and automatically erase all data after 10 failed password attempts. This is also a fairly good anti-theft countermeasure, just make sure you don’t forget it yourself or you could accidentally wipe your device. 

 |
| 8 Simple Tips to Speed Up an Old Mac Posted: 19 Mar 2012 09:07 AM PDT 
If you have an older Mac that feels slow and sluggish from time to time, follow these simple tips to regain some long lost speed. Ranging from a few basic Finder tweaks to some general maintenance and usability tips, your Mac should be feeling quicker in day-to-day tasks in no time. The first three tips can be done in the same “View Options” panel, so take care of those at the same time. Be sure to click “Use as Defaults” so the changes are universally accepted, not just on a per-folder basis. - Disable Thumbnails in Finder – Each thumbnail of an image or document takes resources to render and display, disabling these in favor of the default icons can give a nice performance boost when in the Finder:
- Open a Finder window, and click the “View” menu, selecting “View Options”, then uncheck “Show Icon Preview”
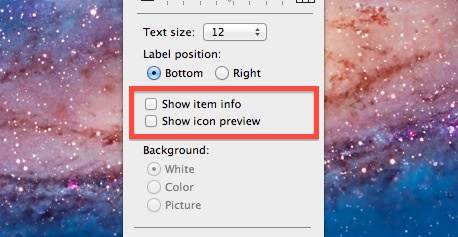
- Disable Item Info in Finder – This shows you things like dimensions of pictures, it’s useful but it has to be pulled from the file and takes resources to do so. Disable it if it’s enabled.
- While in View Options, uncheck “Show Item Info”
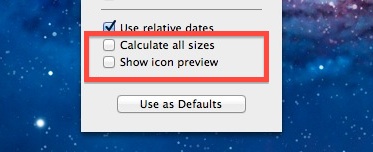
- Disable Size Calculations – While it’s handy to see the file and folder size of everything while in directory list view, it causes the system to check each files size and add them together. With huge folders, this can take a very long time and it’s not unusual to find the Finder process taking up 15-20% CPU while the sizes are being generated, disable this.
- Also in View Options but only for directories shown in “List” view, uncheck “Calculate All Sizes” to speed things up considerably
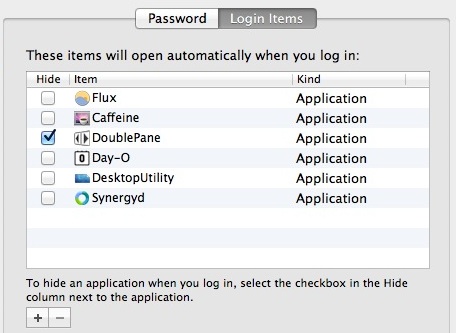
- Remove Login Items – This will mostly speed up the boot process by reducing the amount of applications that are launching on boot and reboot, but it also has the benefit of reducing running processes which are taking up system resources. A general rule of thumb is this: if you don’t use something, disable it.
- Open System Preferences, click on “Accounts” and go to “Login Items”, remove everything you can get away with removing
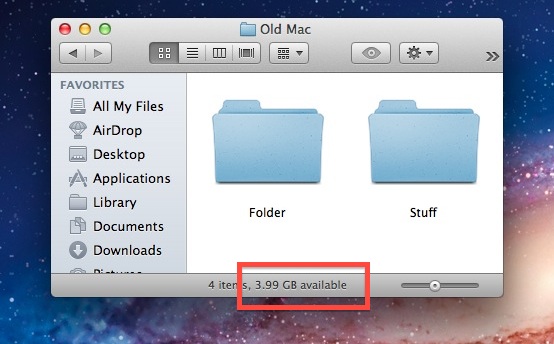
- Keep 5% of Total Disk Space Available – Be sure to always have sufficient free space available on the hard drive for caches, temporary files, and virtual memory (swap). Once your hard drive gets full or almost full, things will really slow down as the operating system is constantly having to remove and manage cache files and virtual memory to make room for new caches and swap items. Doing this on demand is slow and bogs down resources, so keep a healthy disk space buffer and prevent the headache. This is good advice for all computers really, old or new.
- Quickly see available disk space by hitting Command+/ to show a Finder window status bar, if it’s less than 5% of total disk space, delete unnecessary files until you can recoup a couple GB’s of storage
- Clear Files and Folders Off Desktop – Each file and folder shown on the desktop uses memory to display. Use the home folder and their directories to sort and store files, or at the very least, throw everything from the desktop into another folder and keep it in your home directory. We’ve covered this tip before and we’ll reiterate it again because it can make quite a difference, especially on older Macs. If you can’t remember to do this, there are apps that will do it for you.
 - Use the Fastest Web Browser and Slim it Down – Typically the most up to date version of Safari is the fastest browser on a Mac, though many swear by Chrome as well. Whichever browser you choose, limit the number of tabs and windows you have open, and disable or remove all browser extensions and plugins that aren’t 100% essential.
- Quit Unused Applications – While this may seem like common sense, nearly everyone is guilty of leaving apps open that aren’t currently in use. Most newer Macs with quick drives and plenty of RAM can handle this just fine, but older and slower Macs really feel the pinch when a handful of apps like Photoshop or Firefox are left running in the background, even if they’re not in use. Get in the habit of quitting apps when you are done with them, or if you aren’t going to use them for a while.
- Bonus: Clean Reinstall Mac OS X – OK this isn’t necessarily simple or convenient, but completely formatting and reinstalling Mac OS X can make a huge difference in performance because it forces you to start from scratch with no installed software, no lingering cache and preference files, no custom settings, nothing. If your Mac is especially old, say from 2006 or 2007 and still running the same version of OS X it shipped with, a fresh reinstall is strongly recommended.
Give these and go and let us know how they work for you, and chime in the comments with any of your own performance tips while you’re at it. While you’re at it, don’t miss some basic Mac OS X maintenance tips too, though you already have cleaned off the desktop, and you regularly back up your Mac, right? 

 |
| Unhide Purchases from the App Store in iOS Posted: 19 Mar 2012 05:07 AM PDT 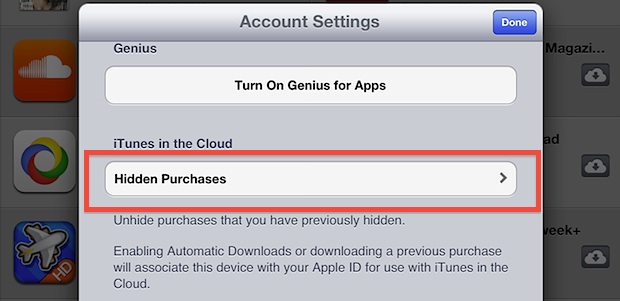
Need to reveal hidden App Store purchases so you can access and download them? It’s easy to do directly on an iOS device, grab the iPhone, iPad, or iPod touch and do the following: - Launch the App Store
- Scroll down to tap on “Apple ID: email@address.com”
- Tap “View Apple ID”
- Enter the password for the account
- Scroll down and tap on “Hidden Purchases”
- Find the app(s) you wish to unhide, and tap the “Unhide” button
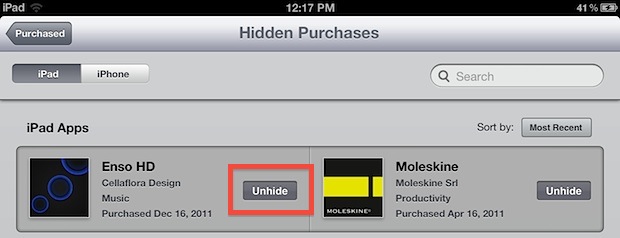
- Find the unhidden apps under the “Purchased” section of App Store
Remember, you can always hide a purchase from the App Store again by swiping next to its name in the purchased list. 

 |




0 comments:
Post a Comment