


OS X Daily: “How to Install & Run Ubuntu Linux in VirtualBox” plus 2 more |  |

- How to Install & Run Ubuntu Linux in VirtualBox
- Remove the Auto-Hiding Dock Delay in Mac OS X
- Improve iPad Picture Frame with a Custom Photo Album
| How to Install & Run Ubuntu Linux in VirtualBox Posted: 27 Mar 2012 10:45 AM PDT
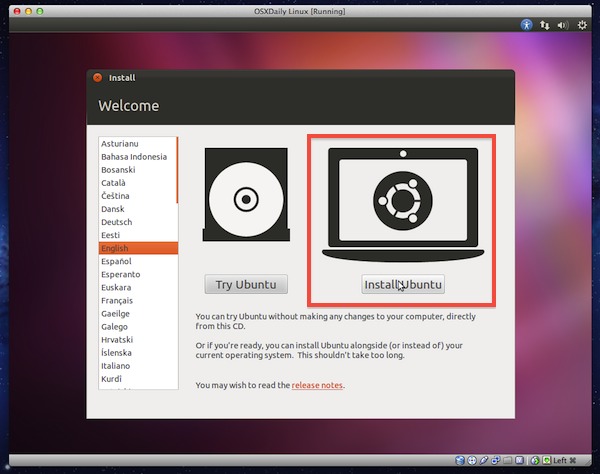
If you want to experiment with Linux without dual booting and potentially impacting your main operating system, the best way to do so is with virtualization. Virtualization allows you to run Linux directly atop your primary OS, whether it’s Mac OS X or Windows, in a separate virtual machine, with practically no potential for error. It’s completely free and fairly easy to set up, we’ll walk you through the entire process.
Requirements
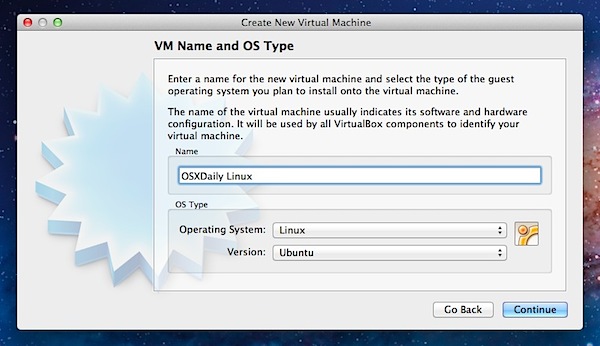
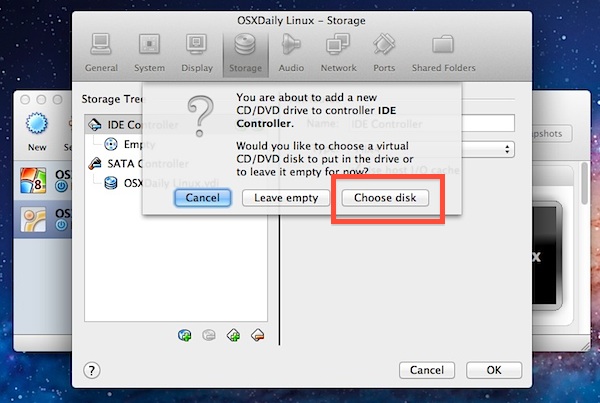
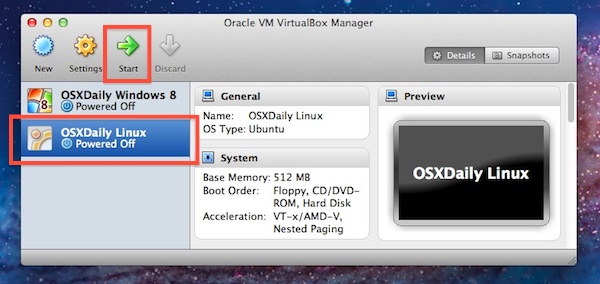
Be sure to meet the above requirements before beginning. Once VirtualBox is installed and the Ubuntu ISO is downloaded, you can proceed with set up and installation. Installing Ubuntu Linux in VirtualBox
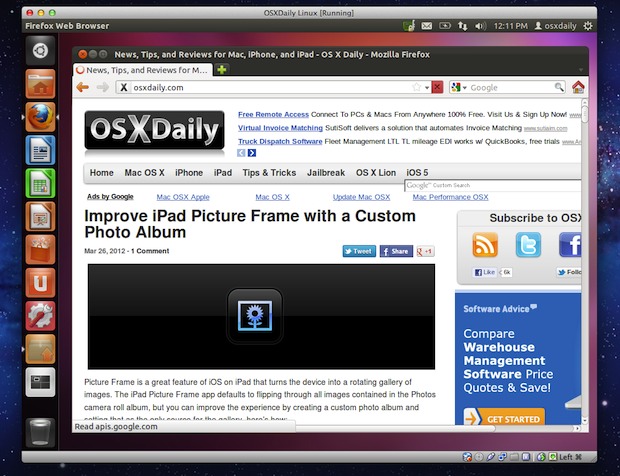
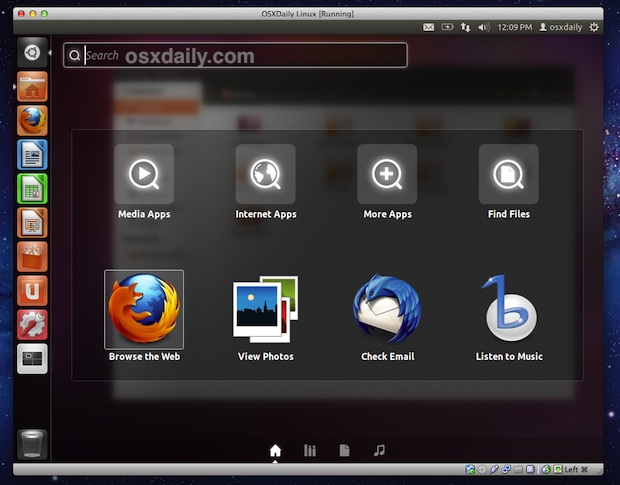
How long it takes to install Ubuntu Linux in the virtual machine varies on the speed of the computer and the speed of the internet connection, but somewhere between 20 and 45 minutes is not unusual. When finished, Ubuntu Linux will boot into the desktop and you can start exploring and having fun. Because Ubuntu is contained within a virtual machine, it’s practically impossible to screw up your host computer, so feel free to explore, try out new commands, install random software, and learn without fear of breaking anything. The only thing you can potentially mess up is the virtual machine itself, which is unlikely but could be simply deleted and reinstalled again if it happened.
If you enjoyed this post, don’t miss our other VirtualBox how-to guides, including:
VirtualBox works with just about any other operating system you can think of. Being a free solution, it’s performance is not as impressive as VMWare or Parallels though, and if you intend on using virtual machines for production it would be worth considering a paid solution for maximum performance.
|
| Remove the Auto-Hiding Dock Delay in Mac OS X Posted: 27 Mar 2012 08:46 AM PDT
If you use a hidden Dock in Mac OS X, you can speed up the time it takes to show the Dock with a defaults write command. This command removes the delay from when a cursor is hovered near the Dock location and to when it’s displayed, it doesn’t change the animation speed of the dock sliding in and out itself. Remove the Delay for Auto-Hide & Auto-Show of DockLaunch the Terminal and enter the following defaults write command:
The tail end of the command includes killall which will cause the Dock to relaunch in order for changes to take effect. After it has been refreshed, hover over the area of the screen where the Dock is hidden and you’ll notice it shows up immediately, without the fraction of a second delay. This tip also impacts how to show the Dock in a full screen app, preventing the need for a double-swipe down when in full screen mode, and instead displaying the Dock instantly with a hover in the region. Return to Default Dock Hide/Show DelayTo return to the default setting and autohide delay, go back to the Terminal and enter the following command:
The Dock will again relaunch and settings will return to their default state. This is a handy tip from MacWorld, thanks for sending it in Eric
|
| Improve iPad Picture Frame with a Custom Photo Album Posted: 26 Mar 2012 11:14 AM PDT
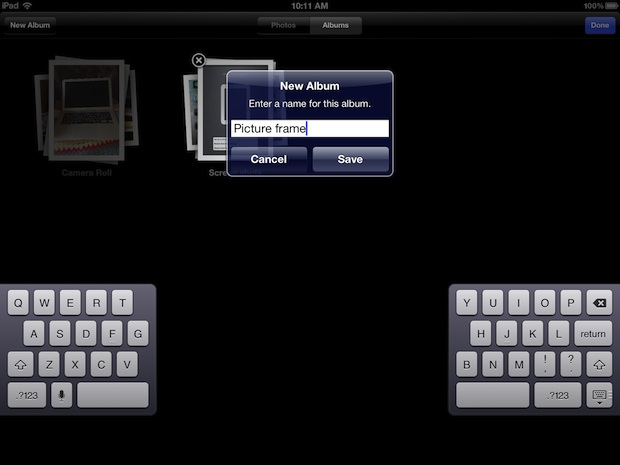
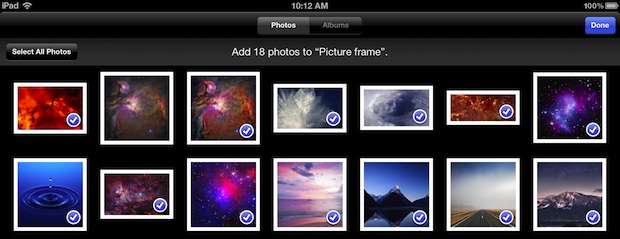
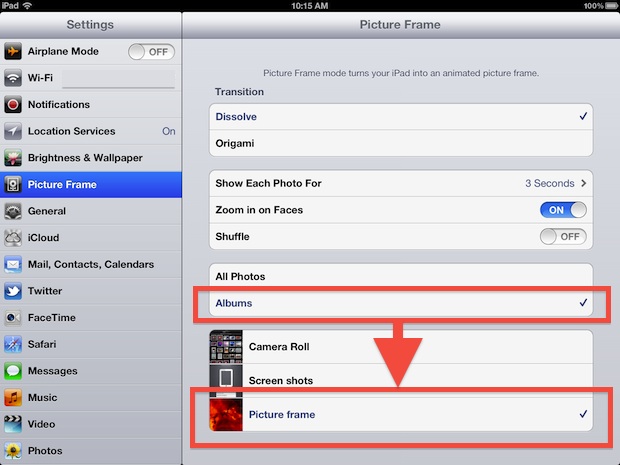
Picture Frame is a great feature of iOS on iPad that turns the device into a rotating gallery of images. The iPad Picture Frame app defaults to flipping through all images contained in the Photos camera roll album, but you can improve the experience by creating a custom photo album and setting that as the only source for the gallery, here’s how:
Now Picture Frame won’t bore viewers with screenshots and embarrass you with bad pictures from the Photo Booth app. If you’re looking for some high res images to show in the picture gallery, don’t miss our recent post with 13 retina iPad wallpapers, they make for great backgrounds and pleasing eye candy.
|


| You are subscribed to email updates from OS X Daily To stop receiving these emails, you may unsubscribe now. | Email delivery powered by Google |
| Google Inc., 20 West Kinzie, Chicago IL USA 60610 | |
0 comments:
Post a Comment