


OS X Daily: “Create ISO Images from the Command Line” plus 3 more |  |

- Create ISO Images from the Command Line
- Fix for Personal Hotspot Missing After iOS Update
- How to Transfer Everything from an Old iPad to New iPad
- Get a New iPad 3 Tonight at Midnight from Walmart, 15-25 iPads in Stock Per Store
| Create ISO Images from the Command Line Posted: 16 Mar 2012 10:34 AM PDT
While the command line is generally reserved for advanced users, using it to create ISO’s isn’t too complicated and will save you the hassle of having to download any third party apps. If you’re new to the Terminal, remember that dragging & dropping files into the Terminal window will print their full path, making it easy to point to source files and preventing any navigation through the command line. Creating an ISO with hdiutilThe most reliable method is uses hdiutil, here is the syntax:
Here’s an example, creating an iso from a Windows 7 installer disc, with the end result showing up on the desktop:
The -joliet flag is necessary to make the iso fully compatible with Windows and other OS’s, though if your only requirement is to use the iso on a Mac you can leave it off. Making an ISO with ddAnother approach is by switching around a previously discussed dd command, which makes it go from burning an image to creating an image. This may not be as reliable and it requires additional steps, so use dd only if you have a good reason not to use the primary hdiutil method. Use the ‘diskutil list’ command to discover the disks identifier that you will need to make an ISO with dd from.
dd is often faster than hdiutil, but it’s definitely for more advanced users. Converting Other Disk Image Formats to ISO
|
| Fix for Personal Hotspot Missing After iOS Update Posted: 16 Mar 2012 09:03 AM PDT
We’ve heard from a few readers in our comments and through emails that after updating to iOS 5.1 their Personal Hotspot disappeared on the iPhone. The reason for this is unclear, but thankfully the fix is extremely easy:
Now tap back to Settings and you should see the familiar Personal Hotspot option. Yes, you will lose your wireless network passwords and custom DNS settings by resetting network preferences, so be sure to note any necessary network settings before doing so. Strangely enough, the same Personal Hotspot disappearance happened with some users who updated to iOS 5 too, so presumably it may even happen in the future with yet another iOS update. Why? It’s probably a bug, but it’s so easy to fix it’s not that big a deal. Thanks to Gregory for the solution!
|
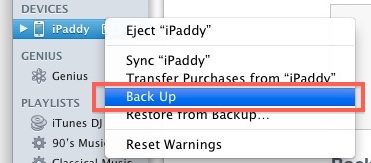
| How to Transfer Everything from an Old iPad to New iPad Posted: 16 Mar 2012 07:21 AM PDT
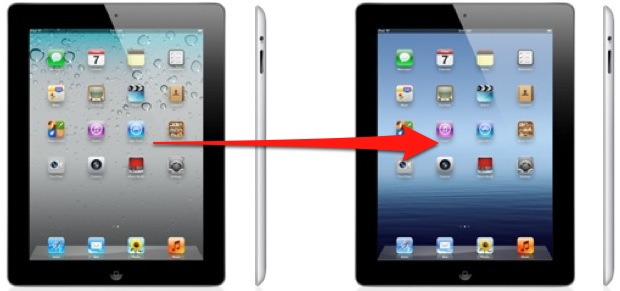
So you just upgraded to a new iPad, and you want to move all of your apps, pictures, settings, and data from an old iPad to the new iPad, right? Doing this is easy, you can go the post-PC route with iCloud (recommended), or the old fashioned way with iTunes, we’ll show you both. Transfer Data from Old to New iPad with iCloudUsing iCloud is by far the easiest method, but you’ll obviously need to have iCloud set up and configured for this to work. This is the post-PC method, you won’t need to use a computer at all. From the Old iPad
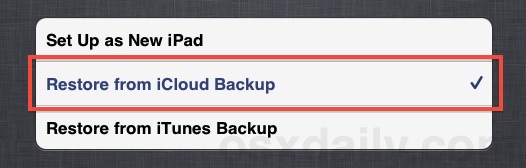
Your work on the old iPad is finished, now pick up the brand new iPad and turn it on. From the New iPad
How long the transfer takes depends on how much stuff you keep on the iPad and how fast your internet connection is. Just let the process complete and don’t interrupt it or lose the wifi connection. Move an Old iPad a New iPad with iTunesYou can also migrate an old iPad to a new iPad with the help of iTunes. This is the old fashioned way since it requires hooking up the iPads to a computer, but it works just fine if you don’t have iCloud or you aren’t on a fast internet connection. These instructions are the same for Mac OS X or Windows. With the Old iPad
With the New iPad
Restoring from iTunes may actually be quicker than restoring from iCloud, depending on the size of your backups and the speed of the internet connection. Even so, migrating with iCloud is the easiest and thus what is most recommended. Note: If you already set up the new iPad, you can easily return to the original set up and configuration screen required for the transfer by tapping from Settings > General > Reset > Erase All Content and Settings, this will reset any iOS device to factory defaults. This erases everything on the iPad, so only do this if you are certain.
|
| Get a New iPad 3 Tonight at Midnight from Walmart, 15-25 iPads in Stock Per Store Posted: 15 Mar 2012 02:34 PM PDT
Walmart was listed in our “where to buy a new iPad” post as a good place to get the third gen iPad, but today they sent out an email to several sites stating they will actually start selling the hotly anticipated device tonight at 12:01AM local time. This means if you want to beat the morning lines at Apple Stores and don’t want to wait a few weeks for a delivery, spending your evening at Walmart may be the best bet. We confirmed the sale by calling around to a handful of Walmarts in various western states and all but a few stores confirmed the midnight offering, though they either didn’t know or wouldn’t specify which models were to be available other than “black and white” colors. We were told stocks ranging from 15 to 25 units on hand, though many stores were mum on details and some said they weren’t allowed to say. Here’s the original email quote from Walmart, courtesy of MacRumors:
You can find a local 24 hour Walmart using their store locator, though it may be worth calling ahead to confirm the sale is on and that units are in stock. Good luck!
|
 You can create ISO images from any source disk or data by using the command line in Mac OS X. This isn’t too different than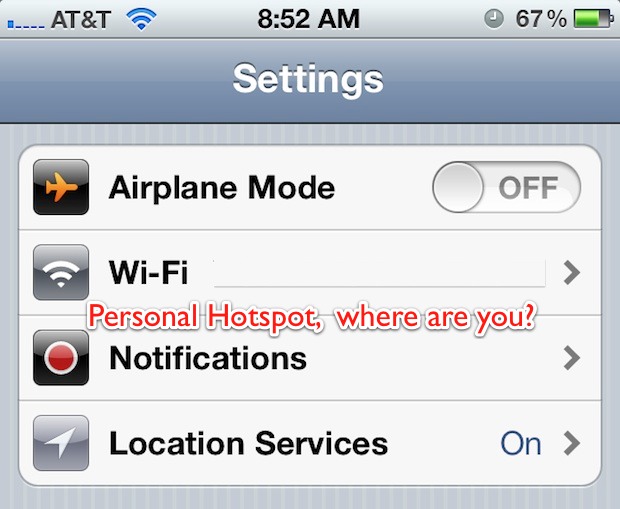

| You are subscribed to email updates from OS X Daily To stop receiving these emails, you may unsubscribe now. | Email delivery powered by Google |
| Google Inc., 20 West Kinzie, Chicago IL USA 60610 | |
0 comments:
Post a Comment