


OS X Daily: “6 Ways to Force Quit Mac Applications” plus 2 more |  |

- 6 Ways to Force Quit Mac Applications
- Change (Spoof) a MAC Address in OS X Lion & OS X Mountain Lion
- How to Enable Caps Lock on iPhone, iPad, and iPod touch
| 6 Ways to Force Quit Mac Applications Posted: 02 Mar 2012 04:52 AM PST
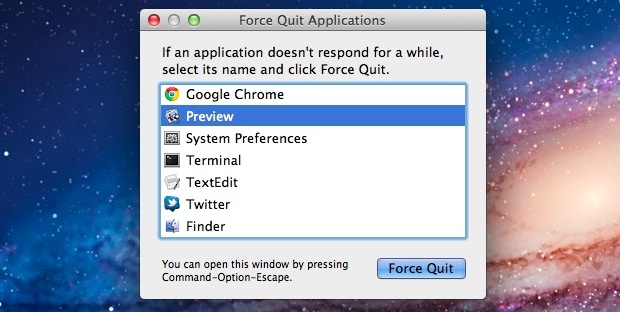
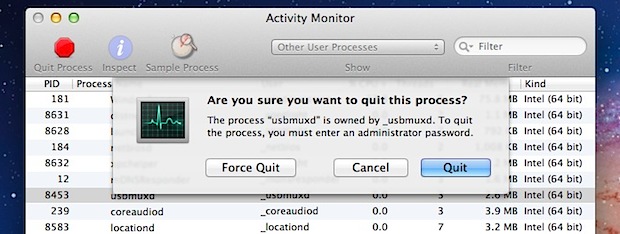
Is your Mac seeing the infamously dreaded spinning beachball of death? Is an app failing to respond? Maybe you have an errant process or two? Here are six ways for apps to be force quit on a Mac, remember a few keyboard shortcuts or sequences now and save yourself a hassle later. 1) Force Quit Currently Active Mac App with the KeyboardHold down Command+Option+Shift+Escape for a second or two until the app forcibly closes. This is the quickest way to force quit the foreground application in Mac OS X and a very good keyboard shortcut to remember. 2) Bring Up the “Force Quit Applications” WindowHit Command+Option+Escape to bring up the simple “Force Quit Applications” window, then click to select the app name, followed by clicking the “Force Quit” button to end the app immediately. Think of this as a simplified version of Activity Monitor, and it’s also a great keystroke to remember to use since it allows for quickly ceasing multiple apps. 3) Force Quitting Apps from the DockOption + Right Click on an apps icon in the Dock to bring up the “Force Quit” option, selecting this will kill the app without any confirmation. 4) Force Quit from the Apple MenuHold the Shift Key and click on the Apple menu to find “Force Quit [Application Name]“. This is easy to remember but not necessarily the most powerful method, since sometimes an application is completely unresponsive and the menus are inaccessible. 5) Use Activity Monitor to Force Quit AppsBring up Spotlight with Command+Space and then type Activity Monitor. Select the process name or ID you wish to kill (unresponsive apps will usually appear as red), and hit the red “Quit Process” button. Think of this as the Mac equivalent to a task manager from the Windows world and a more complex version of the second tips Force Quit window. If one of the previous methods fails, this will almost certainly work. 6) Using the Terminal & kill CommandIf all else fails, using the command line is a surefire way to force an app or process to quit by issuing the low-level kill command. Launch the Terminal and type one of the following commands:
For example, “killall Safari” would kill all instances of the Safari process. If you know the process id, which you can find with the ps or ‘ps aux’ command. Aim kill at that process specifically:
The kill commands will take out just about anything, and sometimes have the side effect of not honoring Versions, Window Restore, and Auto-Save, so be cautious of potential data loss. Bonus: Force Quit on iOSOK it’s not quite the Mac, but it’s useful to know for mobile users: from the iOS side of things, you can force quit apps on iPhone, iPad, or iPod touch, by holding down the Power button until the slide to power option appears, and then hold the Home button until the app closes.
|
| Change (Spoof) a MAC Address in OS X Lion & OS X Mountain Lion Posted: 01 Mar 2012 01:08 PM PST
A MAC address is a unique identification number assigned to network interfaces, these can be attached to physical hardware like NIC and Wi-Fi cards or assigned to virtual machines. On some occasions, you’ll need to change a MAC address to another ID. We’ve received a few questions about this recently because the process of changing (sometimes called spoofing) these addresses has changed slightly from version to version in Mac OS X. With that in mind, we will show you how to change a MAC address in the latest versions of OS X 10.7 and 10.8. Launch the Terminal found within /Applications/Utilities/ to get started. Get a New MAC Address
MAC addresses are always in the format of xx:xx:xx:xx:xx:xx, yours must conform to this format in order to work. For the purpose of this walkthrough the randomly generated address of “d4:33:a3:ed:f2:12 ” will be used. Changing the MAC AddressIf you aren’t in the Terminal yet, open it now. We’ll use the interface en0 for this, but yours could be en1 (read notes at bottom). The command for changing the MAC address is as follows:
Replace “xx:xx:xx:xx:xx:xx” with the desired MAC address, in the example case this will look like:
Hit return and enter the administrators password to set the new address. To confirm it has been changed, type the following:
You can also find it in Network preferences, though the GUI doesn’t always report the MAC change immediately, instead waiting until the network connection has been cycled. Notes & Troubleshooting
The whole process should take no more than 15 seconds or so, as demonstrated in this video:
|
| How to Enable Caps Lock on iPhone, iPad, and iPod touch Posted: 01 Mar 2012 12:56 PM PST
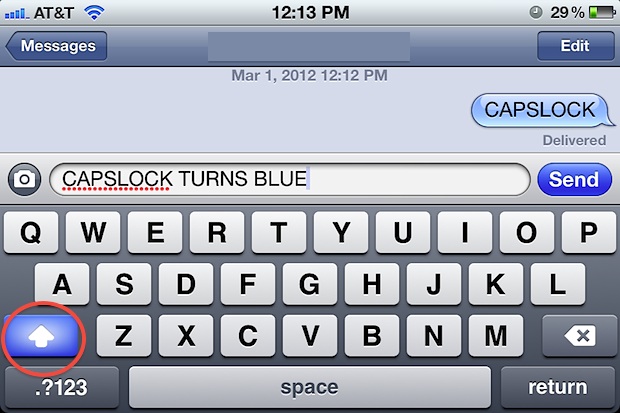
CAPS LOCK is widely hated but sometimes necessary. If you find yourself needing to use caps lock on an iPhone, iPad, or iPod touch, get access to the touch keyboard and:
You’ll know caps lock is enabled because the shift key turns blue. Caps Lock is actually a fairly new feature to be enabled by default in iOS. Prior to iOS 5, users had to tap through to Settings > General > Keyboard and then manually enable the ability to turn on caps lock this way. Now this process is reversed, with the double-tap feature enabled by default. Nonetheless if you hate caps lock or find yourself accidentally enabling it, you can still disable it completely by flipping the “OFF” switch in Keyboard settings. Now the next time you feel the need to virtually yell from iOS you can do so.
|

| You are subscribed to email updates from OS X Daily To stop receiving these emails, you may unsubscribe now. | Email delivery powered by Google |
| Google Inc., 20 West Kinzie, Chicago IL USA 60610 | |
0 comments:
Post a Comment