


OS X Daily: “Restore Accidentally Deleted Apps on iPhone & iPad” plus 2 more |  |

- Restore Accidentally Deleted Apps on iPhone & iPad
- How to Recover Hard Disk Space on a Mac with OmniDiskSweeper
- Transfer Pictures to iPad the Easy Way with iTunes
| Restore Accidentally Deleted Apps on iPhone & iPad Posted: 19 Apr 2012 01:19 PM PDT
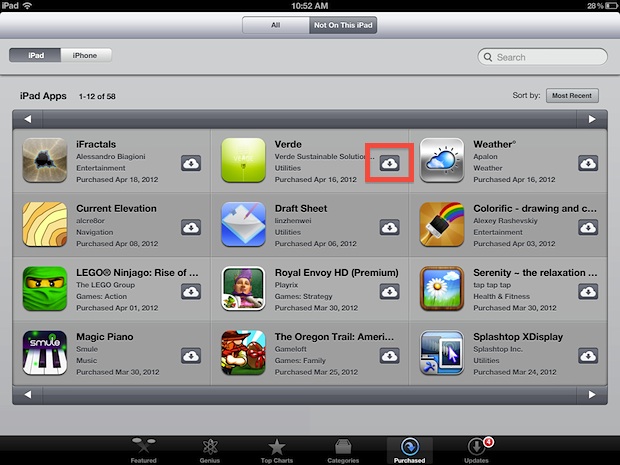
Don’t freak out if you accidentally deleted an app on an iPhone or iPad, they can be easily redownloaded and restored at anytime:
The app will redownload and reinstall itself. You will not be charged for redownloading apps that you already own as long as the Apple ID is the same. iOS apps aren’t the only thing that can be recovered and redownloaded easily though, and this method will work with iTunes Store purchases and Mac App Store purchases as well.
|
| How to Recover Hard Disk Space on a Mac with OmniDiskSweeper Posted: 19 Apr 2012 12:05 PM PDT
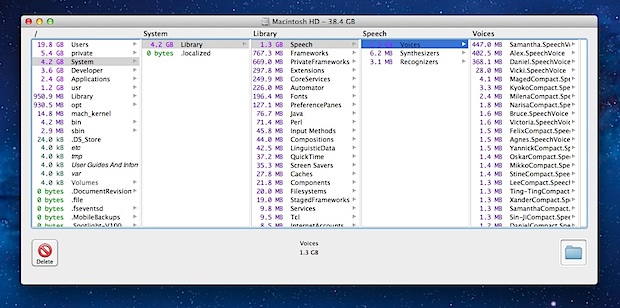
Running out of disk space is no fun and Mac users with smaller drives need to be particularly aware of available disk space. The OS X Finder Search feature can be used to find large files but if you’re really serious about managing disk space and tracking down unnecessary large files and folders, you should use a free tool called OmniDiskSweeper. OmniDiskSweeper is an excellent application for Mac OS X that shows everything on a hard disk in descending order by size, each directory can then be drilled down into further to quickly locate the largest files, and the offending folders or files can be deleted directly from the app. Finding the large files and folders with OmniDiskSweeper is quick and painless:
Important: OmniDiskSweeper is intended for users who are knowledgable about their Mac file system. If you don’t absolutely know what a file or directory is and if it’s necessary or not, do not delete it! There is no going back, and if you accidentally delete important system files or folders you may find yourself having to recover from a backup or reinstalling OS X. You’ve been warned. Exactly what can be removed is going to vary per user and per drive, but everyone will certainly find items that are no longer necessary to keep around. For example, sweeping my drive with OmniDiskSweeper I discovered and removed the following items:
Ultimately how much all this matters and how much disk space you need to reclaim is going to depend on the capacity of a Mac hard drive. I use a MacBook Air 11″ with only a 64GB SSD making each 1GB of unnecessary files or folders significant, and I was able to quickly recover about 12% of total disk capacity just by looking through OmniDiskSweeper and removing what I know isn’t needed. Consider adding OmniDiskSweeper to part of a general Mac maintenance routine, even those with very large hard drives will find it to be an effective method of keeping a file system under control.
|
| Transfer Pictures to iPad the Easy Way with iTunes Posted: 19 Apr 2012 09:13 AM PDT
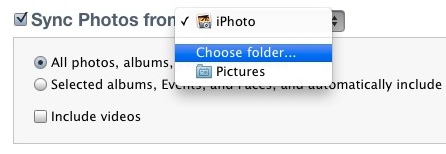
Transferring photos from a computer to the iPad is very easy with the help of iTunes. To get started, you’ll need either a Mac or PC with iTunes, a USB connector cable for the iPad, and a folder containing the pictures you want to transfer over to the iPad. The process is exactly the same in both Mac OS X and Windows, which is why it’s the easiest universal method to transfer photos to an iPad from any computer.
The images will sync over and create a new album within the iPad Photos app that contains all the pictures. If the selected folder contains subfolders with pictures, those will transfer as well, but you can uncheck subfolders if you want them excluded. If you need to do the reverse and get pictures off of an iPad or iPhone, transferring photos from iOS to a computer is also simple and can be done entirely outside of iTunes. Finally, setting up iCloud gives access to the Photo Stream feature, which will automate the entire process of syncing pictures between a Mac and an iPad, iPhone, or iPod touch. If you haven’t signed up for the free iCloud service yet, you should do so.
|

| You are subscribed to email updates from OS X Daily To stop receiving these emails, you may unsubscribe now. | Email delivery powered by Google |
| Google Inc., 20 West Kinzie, Chicago IL USA 60610 | |
0 comments:
Post a Comment