


OS X Daily: “How to Make & Set a Retina-Ready iOS Bookmark Icon for a Website” plus 5 more |  |

- How to Make & Set a Retina-Ready iOS Bookmark Icon for a Website
- Set a Custom Lock Screen Message to Aid Return of a Lost iPad or iPhone
- iTunes 10.6.1 Released With Bug Fixes
- Change a Login Name in Mac OS X
- 51% of US Households Own Apple Products
- 10 Tips to Reduce iPhone & iPad Personal Hotspot Data Usage
| How to Make & Set a Retina-Ready iOS Bookmark Icon for a Website Posted: 29 Mar 2012 11:06 AM PDT
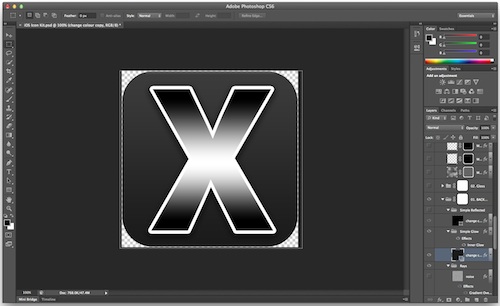
Web developers and website owners pay attention: you need to set a retina-ready iOS bookmark icon. Called an Apple Touch Icon, these custom images become the icon that is displayed on a users home screen when they bookmark a website on an iPad, iPhone, or iPod touch. Without a custom apple-touch-icon set, users will get a boring and often ugly thumbnail of the web page itself, and without using a retina-ready icon, the bookmarks icon will look pixelated and generally awful on the new iPad screen. Here’s what you need to do: 1) Create the Retina-Ready iOS IconUse a template or design your own. I used the easy DIY retina icon kit mentioned in a previous post, it’s a PSD file that makes designing nice looking iOS icons as easy as a click or two. Paste in a website or company logo and you’re pretty much good to go. If you don’t have something to edit PSD files, Photoshop CS6 beta is excellent and free to download and use until the final version comes out later in the year.
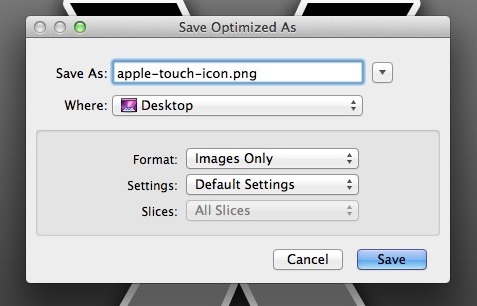
2) Save as PNG & Name the Retina Icon as DesiredThe icon must be a PNG, and it must be named one of two things. Each file name offers a slightly different appearance of the icon as displayed on a users home screen:
Use the latter -precomposed option if you created your own highlight, or if you want the icon to appear more flat without ubiquitous bubble that appears on most of Apple’s default icons. 3) Upload the Touch Icon to the Base Web DirectoryUse an SFTP client (OS X includes FTP in the Finder, and CyberDuck or Filezilla are free) to copy the apple-touch-icon.png file to the root web directory. This is usually the same location that the sites main index file is located. Once uploaded, confirm it’s in the proper location by opening a web browser and going to “http://SITEURL.com/apple-touch-icon.png” and making sure it loads. Here is an example of a 512×512 retina-ready bookmark icon from OSXDaily.com:
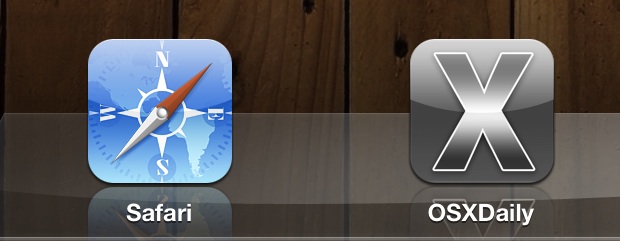
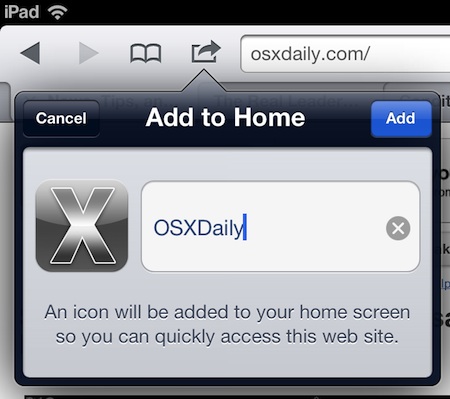
Notice that without the -precomposed flag, the above icon will display the highlight bubble. You can see the difference between the two by comparing the actual icon to the one shown in screenshots as the bookmark. 4) Use an iOS Device and Bookmark the SiteThis is the easiest part, grab an iOS device (preferably an iPad 3 to confirm the retina aspect) and open Safari. Refresh the web site you uploaded the icon to, and then tap the arrow icon and select “Add to Homescreen” name the bookmark, then return to the Homescreen to confirm it’s there.
Despite being 512 x 512 pixels, the retina icon will scale down fine on older iPhones and non-retina devices. If you really want to, you can use CSS and HTML to display different sized icons to different devices, but it’s really not necessary. Now if someone bookmarks your web site on an iPad with a retina display, it will look a lot better on their home screen. That’s really all there is to it. And yes, we’ve written about the Apple touch icon before, but it deserves another mention now that iPad 3 demands significantly higher resolution icons and graphics.
|
| Set a Custom Lock Screen Message to Aid Return of a Lost iPad or iPhone Posted: 29 Mar 2012 09:34 AM PDT
If you’re worried about losing an iPad or iPhone, you can greatly assist the chances of getting the iOS device returned to you by setting a custom “If Found” message as the lock screens wallpaper. This only takes a minute or two to set up:
Be sure to situate the image so that the message is always visible regardless of device orientation, this can be tricky to get perfect, but using a more squared “if found” image fits well. Combine this tip with a secure lock screen passcode and Find My iPad/iPhone (configured within iCloud set up) to provide some added security and to further improve chances of tracking down a lost or stolen iOS device. Mac users can set a similar lock/login screen message in OS X as well, though Lion or newer is required and it’s slightly less obvious than the wallpaper method.
|
| iTunes 10.6.1 Released With Bug Fixes Posted: 28 Mar 2012 10:31 PM PDT
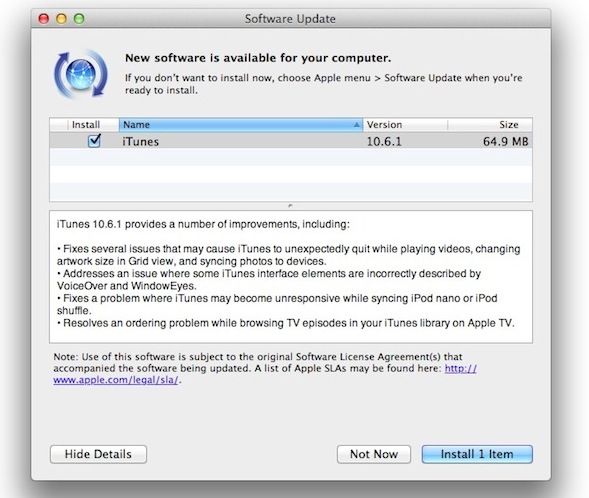
iTunes 10.6.1 has been released, the minor update includes a variety of bug fixes but otherwise provides no new features. The official list of changes is as follows:
The update is recommended for all users of iTunes software, even if the aforementioned issues have not been encountered. Users can download iTunes 10.6.1 through Software Update, from iTunes, or directly from Apple.
|
| Change a Login Name in Mac OS X Posted: 28 Mar 2012 02:45 PM PDT
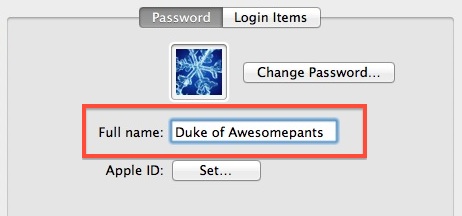
Want to change a user name that appears at the login screen of Mac OS X? It’s very easy to do:
Confirm the login name change took place by logging out or by locking the screen, both of which will bring you to the standard OS X login window. This is the same for OS X 10.7 Lion and OS X 10.8 Mountain Lion. The full name/login name is not to be confused with the short user name of an account, which controls the directory name and SSH logins.
|
| 51% of US Households Own Apple Products Posted: 28 Mar 2012 02:44 PM PDT
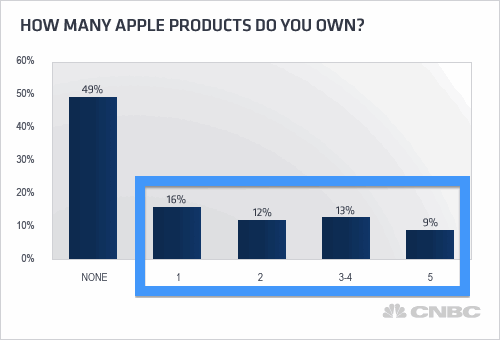
50% of households in the USA own at least one Apple product, and 10% of those without intend to buy an Apple product sometime in the next year. This finding and others were discovered by a recent CNBC poll, which revealed some other fascinating statistics on the ubiquity of Apple gear in the United States.
Owning Apple gear is also a nonpartisan affair, with 56% of both Republican and Democrat party members owning a device. Some of these figures are unsurprising given the tremendous sales volume of Apple gear over recent years, though it’s still an impressive feat for a company that was nearly bankrupt in 1996.
|
| 10 Tips to Reduce iPhone & iPad Personal Hotspot Data Usage Posted: 28 Mar 2012 11:14 AM PDT
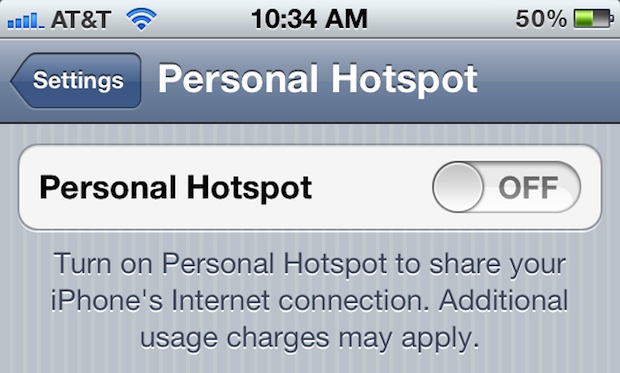
Personal Hotspot is one of the best features of an iPhone and iPad, allowing you to share the devices 3G or 4G LTE internet connection with up to five other connected devices through wi-fi, be them Macs, iPads, iPods, or PC’s. Personal Hotspot may be a mobile users and telecommuters dream, but tethering an internet connection can also eat through the expensive hotspot data plans extremely fast. Avoid overage charges and reduce overall data consumption when tethering with these helpful tips: 1) Monitor Data Usage on iPhone or iPadThe first thing you’ll want to do is keep an eye on how much data you’re using. The easiest way to do this is directly on the iOS device that is sharing it’s internet connection through Personal Hotspot:
You can also check data usage through AT&T and Verizon, though they don’t seem to update as often so they might not be the most reliable method to watch data. 2) Monitor Data & Network Usage on a MacUse a free desktop based bandwidth monitor like SurplusMeter, it sits in your Mac menu bar and keeps an eye on data use for you. Use this in combination with watching data usage directly on the iOS device for best results, as there may be some discrepancies and it’s always better to err on the side of caution with Personal Hotspot to avoid an overage fee. 3) Quit or Disable Desktop Apps with Push NotificationsOS X Mail checks for emails constantly in the background, quit it when the app isn’t in use. Mac OS X Menubar apps like Gmail Notifier and Facebook Notifier ping their servers constantly to look for updates. Quit these apps while using the iOS Hotspot. If it’s getting updates and it’s not 100% necessary for the work at hand, quit the app or at least disable or delay the updating to consume less data. 4) Turn Off iCloud and Dropbox SyncingTemporarily disable cloud syncing apps like Dropbox and iCloud, or else they will continue syncing changes to their respective servers, slowly whittling away your allocated cellular data plan. You can pause syncing from Dropbox by pulling down the Dropbox menu and selection the “Pause Syncing” option, and to turn off iCloud syncing features:
Just remember to restore these options once you’re back on a normal wifi network. 5) Disable Mac OS X Software Update Automatic DownloadsKeeping software up to date is a great general maintenance tip, but disable it when you’re not on a network with plenty of bandwidth:
You can also go a step further and disable the scheduled update checks completely at the same option screen. 6) Disable Chrome and Firefox Automatic UpdatesChrome and Firefox release updates often and both apps will automatically download and update themselves in the background. While convenient on a regular internet connection, these can blow 20MB to 100MB of data easily, disable those automatic app updates for your web browser and you will certainly save some bandwidth. 7) Listen to Music from Local iTunes Library Rather than Pandora, Spotify, or Streaming ServicesAvoid streaming music services while using Wi-Fi Hotspot and instead listen to your local iTunes music library. If you have a MacBook Air with limited disk space and don’t have much of a music library on there, just connect your iPhone to the Mac and play music from that through iTunes instead. Streaming audio is a bandwidth hog, avoid it as much as you can. 8 ) Watch Non-HD Video and MoviesHD video may look leaps and bounds better, but it consumes so much bandwidth that if you’re not careful you can blow through a monthly data plan after watching a single movie or two. Ideally you’ll avoid watching video on a hotspot connection entirely, but if you absolutely must watch something, go for the low-definition version and save hundreds of MB of data. You can usually change from HD to SD directly on a YouTube or Vimeo video page or embed, and you can choose to watch lower quality video through apps like iTunes too. 9) Hold Off on Downloads & StreamingDownloading apps, files, or streaming anything uses tons of data, get in the habit of holding off on things that are not absolutely necessary. Have a new app you want to download? Wait until you’re on wi-fi. Want to watch a new episode of your favorite show from the ABC or PBS app? Wait until you’re on a less restricted wifi connection. Avoid downloading updates through the Mac App Store and Steam too. 10) Use a Data Compression and Monitoring AppOnavo is a data compression app that runs in the background on an iPhone, it is currently for AT&T iPhones only, but it claims it can double or triple the amount of data you can transfer through it’s effective compression. You will likely notice degraded image and audio quality while using the app, and currently no streaming VoIP or video services work, but if you don’t mind that it could help reduce data use. Onavo is free on the App Store for iPhone. Reminder: Re-Enable Settings When Back on Normal Wi-FiWhen you return to a regular high network, remember to re-enable all the settings, syncing services, updates, and other features you disabled while on the road with Personal Hotspot, or else you may find your apps versions lagging behind and you could miss out on some essential security updates. Bonus Tips:
Have any tips to reduce bandwidth? Let us know in the comments!
|



| You are subscribed to email updates from OS X Daily To stop receiving these emails, you may unsubscribe now. | Email delivery powered by Google |
| Google Inc., 20 West Kinzie, Chicago IL USA 60610 | |
0 comments:
Post a Comment