


OS X Daily: “Find a MAC Address in Mac OS X” plus 2 more |  |

- Find a MAC Address in Mac OS X
- 10 Keyboard Shortcuts for Text Navigation & Manipulation in the Command Line
- Change Mail Apps “Mark As Read” Behavior in Mac OS X
| Find a MAC Address in Mac OS X Posted: 28 Feb 2012 03:18 AM PST
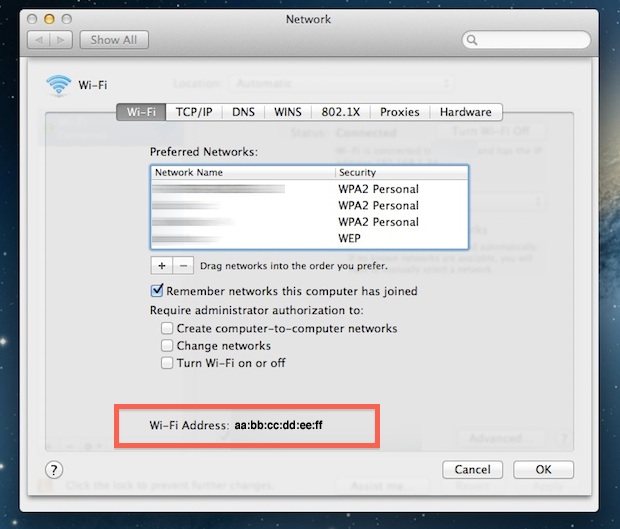
A MAC address is a unique identifier that is assigned to each physical network interface on a computer. Different than a computers IP address, MAC addresses are frequently used for network access control and to monitor network connectivity, and they can be spoofed for virtualization needs or to circumvent some network limitations. If you need to access yours, here’s how to find one from the friendly GUI and the command line. Locate a MAC Address in Mac OS XTo quickly find a MAC address:
The address is always in the form aa:bb:cc:dd:ee:ff, looking something like “ce:9e:8d:02:1d:e9″ or a variation of. Note that the wireless MAC address will be labeled as “Wi-Fi Address” in OS X 10.7 Lion and later as well as iPhone and iOS, whereas it’s called “Airport Address” in Mac OS X 10.6 Snow Leopard and before. List All Network Hardware MAC Addresses in Mac OS XTo quickly list all MAC addresses of network hardware on a Mac, even if they are currently inactive, launch the Terminal and type the following command:
This may return something like this, look for the string following “Ethernet Address” to find the MAC address per interface:
Hardware Port: Ethernet Hardware Port: FireWire Hardware Port: Wi-Fi Notice that even a wi-fi cards MAC address will be referred to as “Ethernet address” using the networksetup command. You can also retrieve individual IP addresses and MAC addresses together with the ifconfig command, although the output isn’t nearly as user friendly. If your intention is to spoof an address, generating a random MAC address is usually the best bet to avoid any network conflicts.
|
| 10 Keyboard Shortcuts for Text Navigation & Manipulation in the Command Line Posted: 27 Feb 2012 01:26 PM PST
We recently covered 12 keyboard shortcuts to help navigate around and manipulate text in Mac OS X, and now we’ll show you a handful of similar tricks for use at the command line. These shortcuts can be used just about anywhere in the Terminal, including the bash prompt. 7 Navigation ShortcutsNavigate around blocks of texts faster with the following shortcuts:
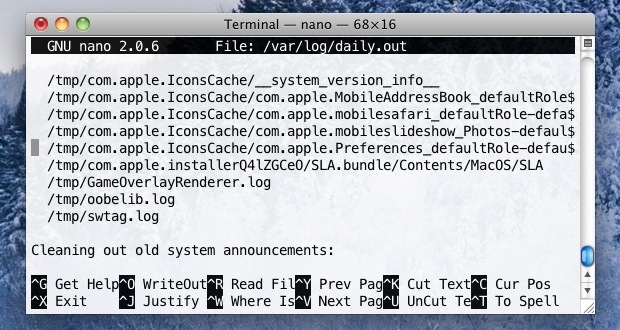
Of course you can also use the arrow keys to navigate within text blocks and to place the cursor for using all commands mentioned. 3 Cutting & Pasting Shortcuts for the Command LineThe command line also has it’s own version of cut and paste, called “kill” and “yank”, and you can reuse two previously mentioned commands for this purpose:
Because the latter two kill and yank commands do not overwrite the clipboard buffer, they can function as a secondary cut & paste command in many GUI based Mac OS X apps as well. Enjoy this? Check out more command line tips in our archives. Thanks to Josh who pointed out some these commands in the comments
|
| Change Mail Apps “Mark As Read” Behavior in Mac OS X Posted: 27 Feb 2012 11:37 AM PST
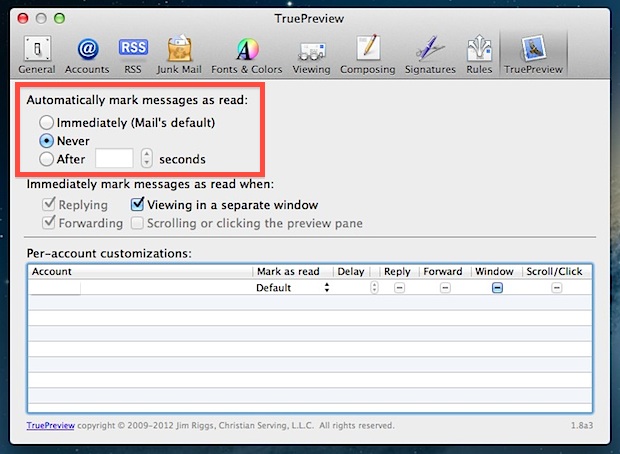
Have you ever noticed that Mail app registers a message as “read” after it has been clicked? The automatic “mark as read” feature makes it easy to quickly skim through a bunch of emails, but Mail doesn’t offer much control over the the delay for when messages are marked read. That’s where TruePreview comes in, it’s a free Mail plugin that gives you control over how Mail app handles messages and their read behavior. With TruePreview, you can set messages to mark as read after a delay, disable the automatic mark as read feature completely, or restore to default settings, it also allows for these customizations to be made on a per account basis, allowing for read behavior to change depending on email addresses.
TruePreview works with Mail app in Mac OS X Lion (10.7.3) and earlier. If you want to uninstall the plugin for some reason, it can be found at:
Deleting that folder and restarting Mail will uninstall TruePreview.
Adjusting Mail Mark As Read Behavior from the Command LineIf you’d rather not add a plugin to Mail app, you can also do some of this through the command line with defaults write commands, if you’re comfortable with that. Launch the Terminal Set the delay to 2 seconds with the following:
Replace the two on the end with any number to change the delay to that many seconds. You can also remove the delay with the following defaults write command:
Return to the default setting with the following defaults delete command:
Removing the delay with these latter commands seems to only impact Conversation view, according to Macworld.
|
| You are subscribed to email updates from OS X Daily To stop receiving these emails, you may unsubscribe now. | Email delivery powered by Google |
| Google Inc., 20 West Kinzie, Chicago IL USA 60610 | |
0 comments:
Post a Comment